I have an old article (Jan 2019) about how I managed to get a Let's Encrypt SSL certificate on my Synology NAS. It's a hack built on a hack (liberal use of `chattr +i` for example!), but it has mostly worked fine for the last couple of years. However, when the cert recently came up for renewal it failed. Instead of fixing, a quick Google search shows there are much better options available now via acme.sh.
What’s acme.sh?
ACME is the protocol used by Let’s Encrypt to handle certificate operations. acme.sh is an implementation of this written entirely in shell script. This is ideal for the Synology where simple dependencies can be a little hard to come by.
It gets better. There is a bunch of built-in hooks for different DNS services
including Cloudflare. This was key to my strategy before as the NAS is not open
to the wider world. I just have an A record point to a local private IP.
It gets even better. The acme.sh repo also comes with a bunch of default deploy scripts, convenience scripts to get up and running on common services (e.g. configure and reload Apache for you, that sort of thing). Turns out there is already a deploy script for Synology DSM! It’s written to utilise the Synology web interface. This means instead of my mega-hack copying the certificate around numerous times and patching nginx configuration files hoping for the best, the new certs will actually survive software upgrades and other system changes.
For those who followed my previous article, here are the rough steps I took to get the Let’s Encrypt cert setup and renewed properly via acme.sh.
Setup
There’s no dependencies, so it’s just a case of cloning the acme.sh repo
and copying to your device. I downloaded on a local machine and used scp,
mostly because I wasn’t sure if wget and unzip were commands available
on the NAS. Aside, a quick check now suggests wget and 7z are available.
I’ve been caught out previously when scripts disappeared that I’ve put in
‘system’ folders post upgrade, so I just used a sub folder under /volume1.
Cloudflare API
You’ll need your Account ID and an API token. There is an option to use the full/global account level API key but I expect for 99% of people that will make no sense.
- Account ID: Head to Cloudflare, login, go to dashboard, scroll down and look on the right.
- API Token: Once logged in, head to the API section, you want to create a new token that has both Zone.DNS (Edit) and Zone.Zone (Read) permissions on the zone you wish to utilize.
I put these values in /root/.acme.sh/account.conf as CF_Token and
CF_Account_ID, or you can just set as environment variables pre execution. Further details here.
Issue Certificate
Let’s Encrypt has fairly strict usage limits,
especially true if you keep hitting problems that cause the issue request to fail,
so let’s start by giving it a test run.
Using the --test option means we won’t get a real cert, well an actual
‘trusted’ cert, but otherwise it’s just like the real deal so allows us to test
our Cloudflare DNS plumbing etc.
./acme.sh --issue -d syn.falkus.co --dns dns_cf --test
Assuming that was all good you can run again without --test for the real thing.
# Note --force if you successfully used the test above, otherwise there is a
# 'valid' cert already available.
./acme.sh --issue -d nas-test.falkus.co --dns dns_cf [--force]
Install Certificate
We now want to deploy our certificate to get the cert files and configuration
for our service all sorted. We are using the synology_dsm deploy hook that
needs a web login to your Synology NAS,
more details here. I created a new user that has no access
to any of the storage areas and used that instead of my normal admin login.
Finally I bundled this into a script for future convenience.
$ cat deploy.sh
export SYNO_Certificate="LE_falkus_co" # Used in Certification Listings
export SYNO_Username="certadmin"
export SYNO_Password="somelongpasswordjustusedforthis"
./acme.sh -d nas-test.falkus.co --deploy --deploy-hook synology_dsm
You should get some output telling you the cert has been successfully installed. Depending on your setup you might need to login to the Synology DSM interface and make the new cert active for the services you require (Web interface, plus other apps). This is the real benefit of using the proper DSM API, the cert appears in the Security Certificate list and so can be enabled ‘as normal’:
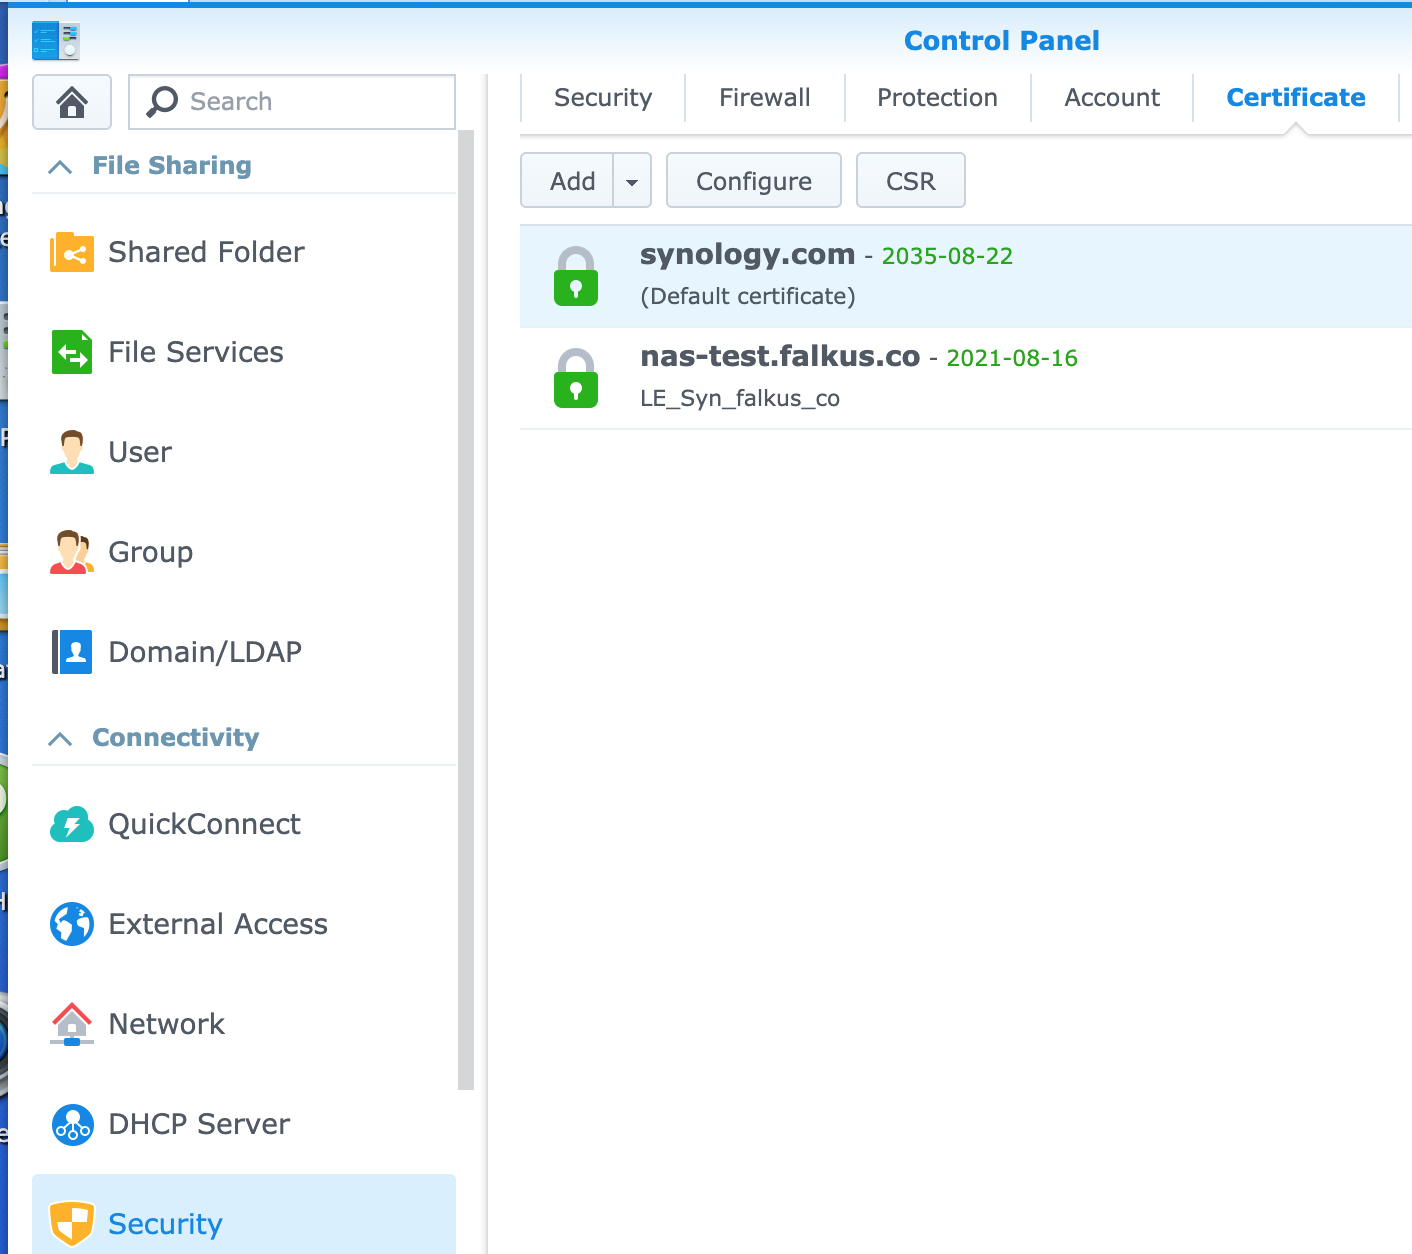
Let's Encrypt Certificate sorted again, ideal.
Auto Renewal
One final step remains. We need to put in place an auto renewal process to avoid having to run the above steps again in ~90 days time.
acme.sh does have an --install option where it will setup a cron entry etc for you. I
wasn’t sure if that would play nice with DSM’s habit of getting rid of anything
it doesn’t recognise on upgrade, so instead I went down the Task Scheduler
route.
From the Synology GUI, head to Control Panel > Task Scheduler. You want to add a
‘user defined script’. The options are all fairly self explanatory. The actual
script path will be /your/install/path/acme.sh --cron.
There is a handy Email only when script exits abnormally option which is useful. This is what you’d expect where any non-zero exit code triggers an email to get sent.
That’s all there is to it! The solution above really should be ‘set it and forget it’. Certainly feeling a lot more confident it’ll work at the next renewal compared with my last approach.