I've been trying to build a mini travel blog website since 2011 to document a road trip around Europe. This post looks a little at why it took me the best part of 10 years to get it finished.
A Tale of Two Parts
Firstly, some thoughts on how to actually finish a project that has been long running. Secondly, some build pointers for those looking to also use Jekyll to document their travel adventures.
Part 1: How To Complete A Project
Quick Back Story
£450 well spent!
In 2011 I went on a road trip with a couple of friends from college. We bought a banger of a car from auction and drove it for a month all around Europe, camping and free-camping as we went. It was a great trip.
From pretty much the first week back in the UK I’d planned to make a mini website to commemorate the adventure. The target audience was just the three of us. The site would be a place to browse the photos, journal entries and stories. Fast forward nearly 10 years later and I’ve finally got something that resembles a finished site.
Recalling 10 Years
2012, the first year after the trip, was uneventful for this project. I collated all the photos into one big folder. Very little progress beyond that. Retrospectively this was a lost opportunity, immediately after the trip is clearly a good time to start documenting it.
2013/2014, I did eventually move on to writing code. Over the next couple of years I dabbled with making a travel-blog CMS. The idea was to document the 2011 road trip but also act as a place where I could add future trips. That sounds kind of cool and useful but without a clear design (not to mention users beyond myself) this never really got anywhere beyond some half-baked prototypes. After abandoning the CMS idea the entire project was paused.
I even managed another trip in 2016 with the same friends before finishing the 2011 site
2016/2017, fast forward another a couple of years and I was doing a bunch of freelance WordPress gigs; building themes and plugins. With my head already in this space a custom theme felt like a natural fit. This got a little further than my travel-blog CMS idea. I had a sort of MVP but didn’t love the design and I was trying to do some clever (read unnecessarily complicated) stuff with maps and showing the route from day-to-day. I ended up sort of lost in the weeds with this feature and lost momentum again with the project.
2018/2019, revisiting the site idea again, I contemplated using a third-party platform just to get something live. The more I went down this route though the less appealing it became. I particularly wanted to keep the site in a portable format, where I could redeploy elsewhere with little hassle. For the site to live a long time, which I think is part of what makes this type of documenting project so appealing (imagine looking back on a trip you took in 20/30/40 years), it needs to avoid being tied to someone else’s platform.
Another year forward and that brings us to 2020. I once again started thinking about documenting the trip and thanks to a year of intermittent lockdowns I had plenty of time to just sit in front of a computer and get it done.
After considering afresh what I really wanted to get out of the site (see the
next section) I settled on a plan: Build a static site in Jekyll. Hardly
ground-breaking tech, but it’s the same software used for the Falkus.co blog,
which means it’s a framework that I can build with quickly. Low maintenance
after the build (it’s just static files), still portable (again,
just flat files) so if I do need to redeploy and host it elsewhere I only
need to git push to a new remote. Ideal.
With a new and simple plan I got straight to it and googled for “travel theme Jekyll”, which lead to this theme by rowanoulton. A clean design that made as good a starting point as any.
Rather than dive in to some interesting feature I forced myself to do the more boring task first of just getting the journal entries and photos on to the site. This meant I quickly had something that was a real MVP. In turn my motivation continued and adding some of the more interesting elements (a fun header and dynamic map) proved enjoyable to do. After those wins I was on the home stretch. A few more evenings of tweaking and I had it in a state good enough to call finished.
Aside: Deciding to use Jekyll reminded me of this fun comic, the best bet for 2030.
Tips to build a site in under 10 years
Trying to distill the lessons from this project leads me towards the below suggestions. They are perhaps all fairly obvious, it’s mostly just the list I need to re-read myself before embarking on the next mini project.
Momentum
I read an article last year about Momentum vs Urgency just before getting back into the travel blog project. (I think it was this one) Momentum is difficult to create once lost. When I returned from the trip I had a decent amount of momentum (not to mention fresh memories!) that could have been used to super-charge initial efforts. Even if I couldn’t face designing and programming straight away, using that momentum to just gather and arrange all the data (pictures, diary entries, videos, other memories and anecdotes that were still in my mind) would have been really helpful.
Storage and retrieval of data are tightly linked. You either spend more time storing and less time retrieving, or more time retrieving but less time storing. I did very little regarding content preparation in the immediate time after the trip, so I effectively opted for the quick storage method. This proved to be another barrier to entry picking things up later on.
Remember The Audience
For the first site attempt I had accidentally muddied the waters by trying to make software that might be useful to others. Clearly sometimes that’s desirable, but this project is a poor example. The real goal was a place for the three of us who did the trip to just view the memorabilia.
I actually found it surprisingly enjoyable building the site knowing that it was just for me and just for this one project. I took a lot of shortcuts I wouldn’t usually take. Shortcuts that don’t really have any negative impact, especially if the codebase is never used again (which is super likely).
Good code structure/DRY principles etc. are drummed into developers from day one but that followed blindly can lead to unnecessary work for this type of fun build. If you are currently yelling at the screen drafting an email to let me know the error of my ways, here is my real-world comparison: Imagine an engineer working on designing cars in their day job. If they take part in a weekend project to build a soapbox racer they are clearly going to balance using their skills whilst also exercising some pragmatism to just get the thing built and enjoy the process.
Simple If Possible
There is a sweet-spot in development where you hit on just the right level of abstraction. The code is easy enough to quickly reason about, powerful enough to support your idea but not so complex that it hinders you.
One of my early ideas was to use WordPress to store all the trip photos and diary entries. That’s fine but this trip was already complete. Beyond the first input of content there’s no benefit to having it in a dynamic system. That dynamic system has also just introduced a load of maintenance, both for initial setup and to keep the site going in the future.
The design I finally settled on is super simple. There are very few moving parts. That made it easy to build but also means it’s easy to reason about in the future if I want to revisit this code in N years.
I simplified from a content perspective as well, dropping an original idea to include a video. We didn’t film loads of the trip and the quality was pretty poor (mostly 640 x 360 footage, shoot on some Canon camera from circa 2005). It wouldn’t have added any value but would have been difficult to do well.
Healthy Peer Pressure
After a bit of a blogging hiatus last year I wrote a 2020 summary post, within which I listed some projects I wanted to complete in 2021. I’d also told a bunch of people about my long running effort to get this site done. The two combined gave me a real boost to just get it finished and live. I’m not sure anyone particularly hassled me on the status, but I dreaded the idea of writing a 2021 review post and still having it hanging around!
Part 2: Build Your Own
Moving on from the conceptual stuff, here is a section of mini tips-and-tricks for others who might be using Jekyll to document their own adventure.
Reversing Posts
If you are doing a travel blog retrospectively you probably want visitors to start at the beginning of your adventure rather than the post detailing your triumphant return. Jekyll pagination will however default to newest post first.
If you have all posts on a single page you can just reverse the loop:
// Find the main post loop, flip reverse it!
{% for post in site.posts %}
// becomes...
{% for post in site.posts reversed %}
However it’s more likely you are wanting to do this alongside some pagination. If you are using
Pagination V2
then you just need to add the following configuration values (note the false for
sort_reverse).
# Pagination
pagination:
    enabled: true
    sort_reverse: false
Photos
We took plenty of photos for the trip. I did consider using a service like Google Photos (or some other third-party photo storage service), perhaps making an album for each day and then embedding this in the relevant post.
However, this goes against trying to make a portable site. I want the site to have the best chance of being available (and fully functioning!) for a long time without maintenance. I don’t want to have to re-work the photos in N years because the service I’m using is going away.
Simple wins here again. I settled on just hosting the photos with the site. I had thought the size of the files would be beyond whatever I could do on a free tier at Netlify. However, a quick google tells me it’s 100GB which is plenty! On the source end, the BitBucket repo for the site has a 2GB limit, but that is also fine. I have around 25 MB of media per day. Even with thumbnail generation and other assets it’s still around the 1 GB mark for the entire trip.
Jekyll Gallery
I used the image-gallery example here that doesn’t require any special Jekyll plugins, although did require a few tweaks for my purposes:
- Switch to using CSS columns to get a sort of non-JavaScript masonry view
- Added on lightbox for a slick photo-to-photo browsing experience
- Generated thumbnails (see below). I updated the template to assume that for each file
foo.jpgthere is an equivalentthumbs/foo.jpg.
Extracting Photos
I collated all the photos after the trip. These started
life in a single folder but they ended up on my Google Photos. My organisation
method was to search a day, e.g. 5th August 2011, delete
any that were no good, rotate any that had the wrong orientation (tech tip: Shift-R
does this, so you can just use the keyboard arrows to go through the search results and
Shift-R to fix any as you go). I’d then download a day at a time and add the
relevant image gallery tag to each post. This process could perhaps be
automated a little, but as the photos needed a once-over anyway it didn’t seem
worth it.
Order By Timestamp
The filenames out of Google Photos are the original names. This didn’t work well with the photos coming from different cameras. Fortunately, the rest of the file meta data is intact, meaning the original timestamps were correct. I renamed the files to reflect this, allowing the Jekyll template to then show the photos in a sensible order.
# From shell directory with the photos...
for f in *; do mv -- "$f" "$(date -r "$f" +%d%h%m%s)-$f"; done
Create Thumbnails
I intended to not create any thumbnails but rely on the browser to do the image scaling. Modern browsers are after all good at this. Plus my target audience (the three of us that did the trip) all have access to semi-decent broadband. However I changed my mind once I got further along. Some posts have a large number of pictures. Plus it just felt sloppy considering how easy it would be to make thumbnails. I used the imagemagik command here to bulk create them:
mogrify -path thumbs -thumbnail 200x200 *.jpg
Maps
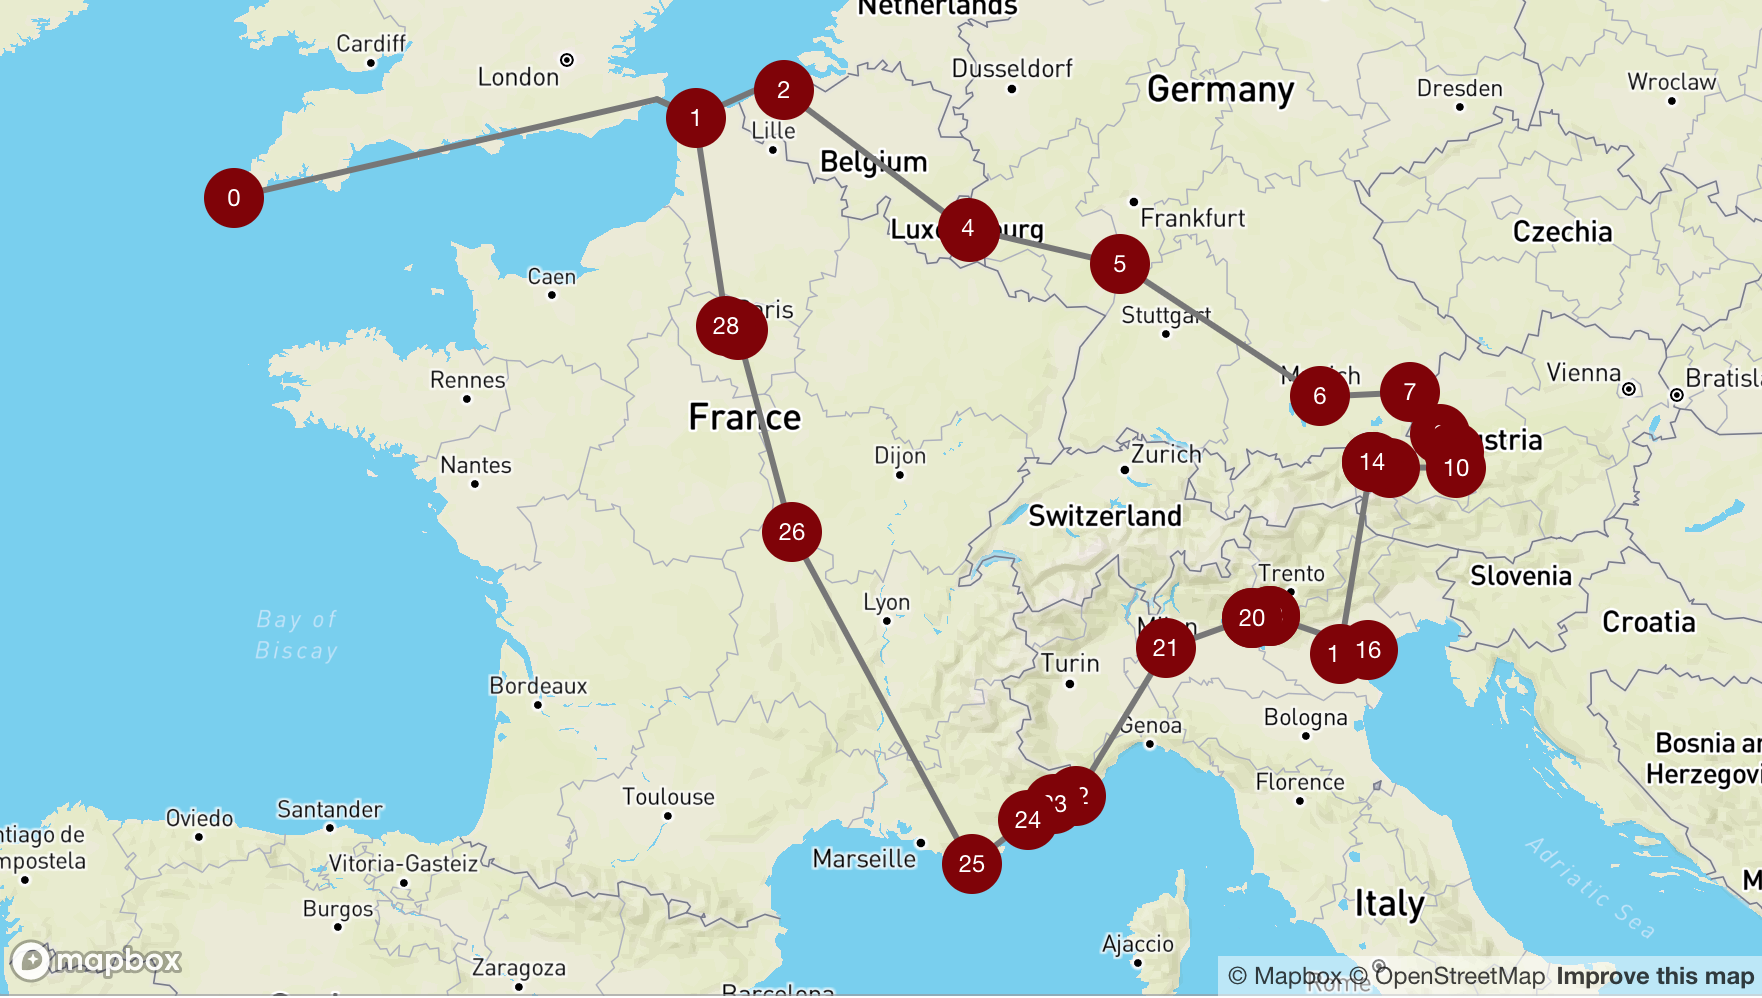
Mapbox showing an overview of the route
Can you even have a travel blog without a map? I don’t have an exact copy of the route, in terms of which specific roads we travelled, but I did have a good idea of overall location for each day. I ended up just drawing straight lines from day to day locations, which I think worked well.
I used Mapbox, their free tier is more than adequate for this site. For each post I created a lat and lon value in the post header, e.g.:
---
layout: post
title:  "Day 2 - Bruges"
date:   2011-08-06 17:00:00
location: Bruges, Belgium
tags: Bruges Belgium
lat: 51.2093
lon: 3.2247
---
Then in the map page Jekyll template I output all of these to a Javascript array which I can use to build a route.
# First make your mapboxgl.Map, then...
map.on('load', function() {
	map.addSource('route', {
		'type': 'geojson',
		'data': {
		   'type': 'Feature',
			'properties': {},
			'geometry': {
				'type': 'LineString',
				'coordinates': latLonList // <-- points array
			}
		}
	});
});
Final icing on the cake was to style some markers. The Mapbox docs are decent, here’s an example of cool popup and marker techniques.
Navigation
Current Page
I find it a little jarring using website navigation that doesn’t have a style to
show me which part of the site I’m currently on. The easy Jekyll way to do this
is comparing page.url to an expected value and then triggering some CSS class, e.g.:
<a href="" {% if '/about' == page.url %} class="active"{% endif %}>...</a>
However this doesn’t work so well for pagination. An alternative is to set an ‘active’ attribute on the template that is paginated, then check for that:
<li {% if 'blog' == page.active %} class="active"{% endif %}><a href="/blog">Diary Entries</a></li>
Random Post Link
Some blogs have a ‘random post’ button (e.g. the ¡Random! button in the header of the MMM blog). This feels useful/fun for the type of content where the order doesn’t necessarily matter. I envision using the road trip website in this way, just loading it up, hitting the ‘random day’ link and reminiscing.
This was very slightly more involved than I first expected as obviously Jekyll is
a static site generator! I got around this by dumping all the URLs out to a
JavaScript
array (seems fine as there are not many), then using JavaScript to randomly
select one via the button’s onClick event.
<!--  In the footer of the site, so after random post button has loaded -->
<script>
// big array of all URLs
var allLinks = [{% for post in site.posts %}"{{ post.url }}"{% unless forloop.last %},{% endunless %}{% endfor %}];

// make a random number, then assign entry to the navbar random button
var i = Math.floor(Math.random() * Math.floor(allLinks.length));
var el = document.getElementById('randomPost');
el.href = allLinks[i];
</script>
Next/Previous post links
For less random days you may want to stick with the expected flow and go from
day to day consecutively. You can use Jekyll’s page.previous.url and
page.next.url values in appropriate anchor tags. There is a nice article and example
here for those interested.
Multiple Jekyll Instances
Once I really got going with the site I’d decided to also write this blog post at the same time. I would code a bit on the travel site and when I felt I had an interesting addition to this post, or I had to google something that others might also google, I’d change my tmux tab and write it whilst still fresh in my mind.
Both sites build via Jekyll though so how can you preview each at
the same time? Easy enough to do, run Jekyll twice and use --port 4001 to
serve one instance on a different port to the default 4000.
Finished Site
You can check out the finished site at roadtrip2011.falkus.co if you are actually interested in reading about the adventure. The site is now done in my mind, although if I suddenly remember a great anecdote that is missing I intend to go ahead and add it.
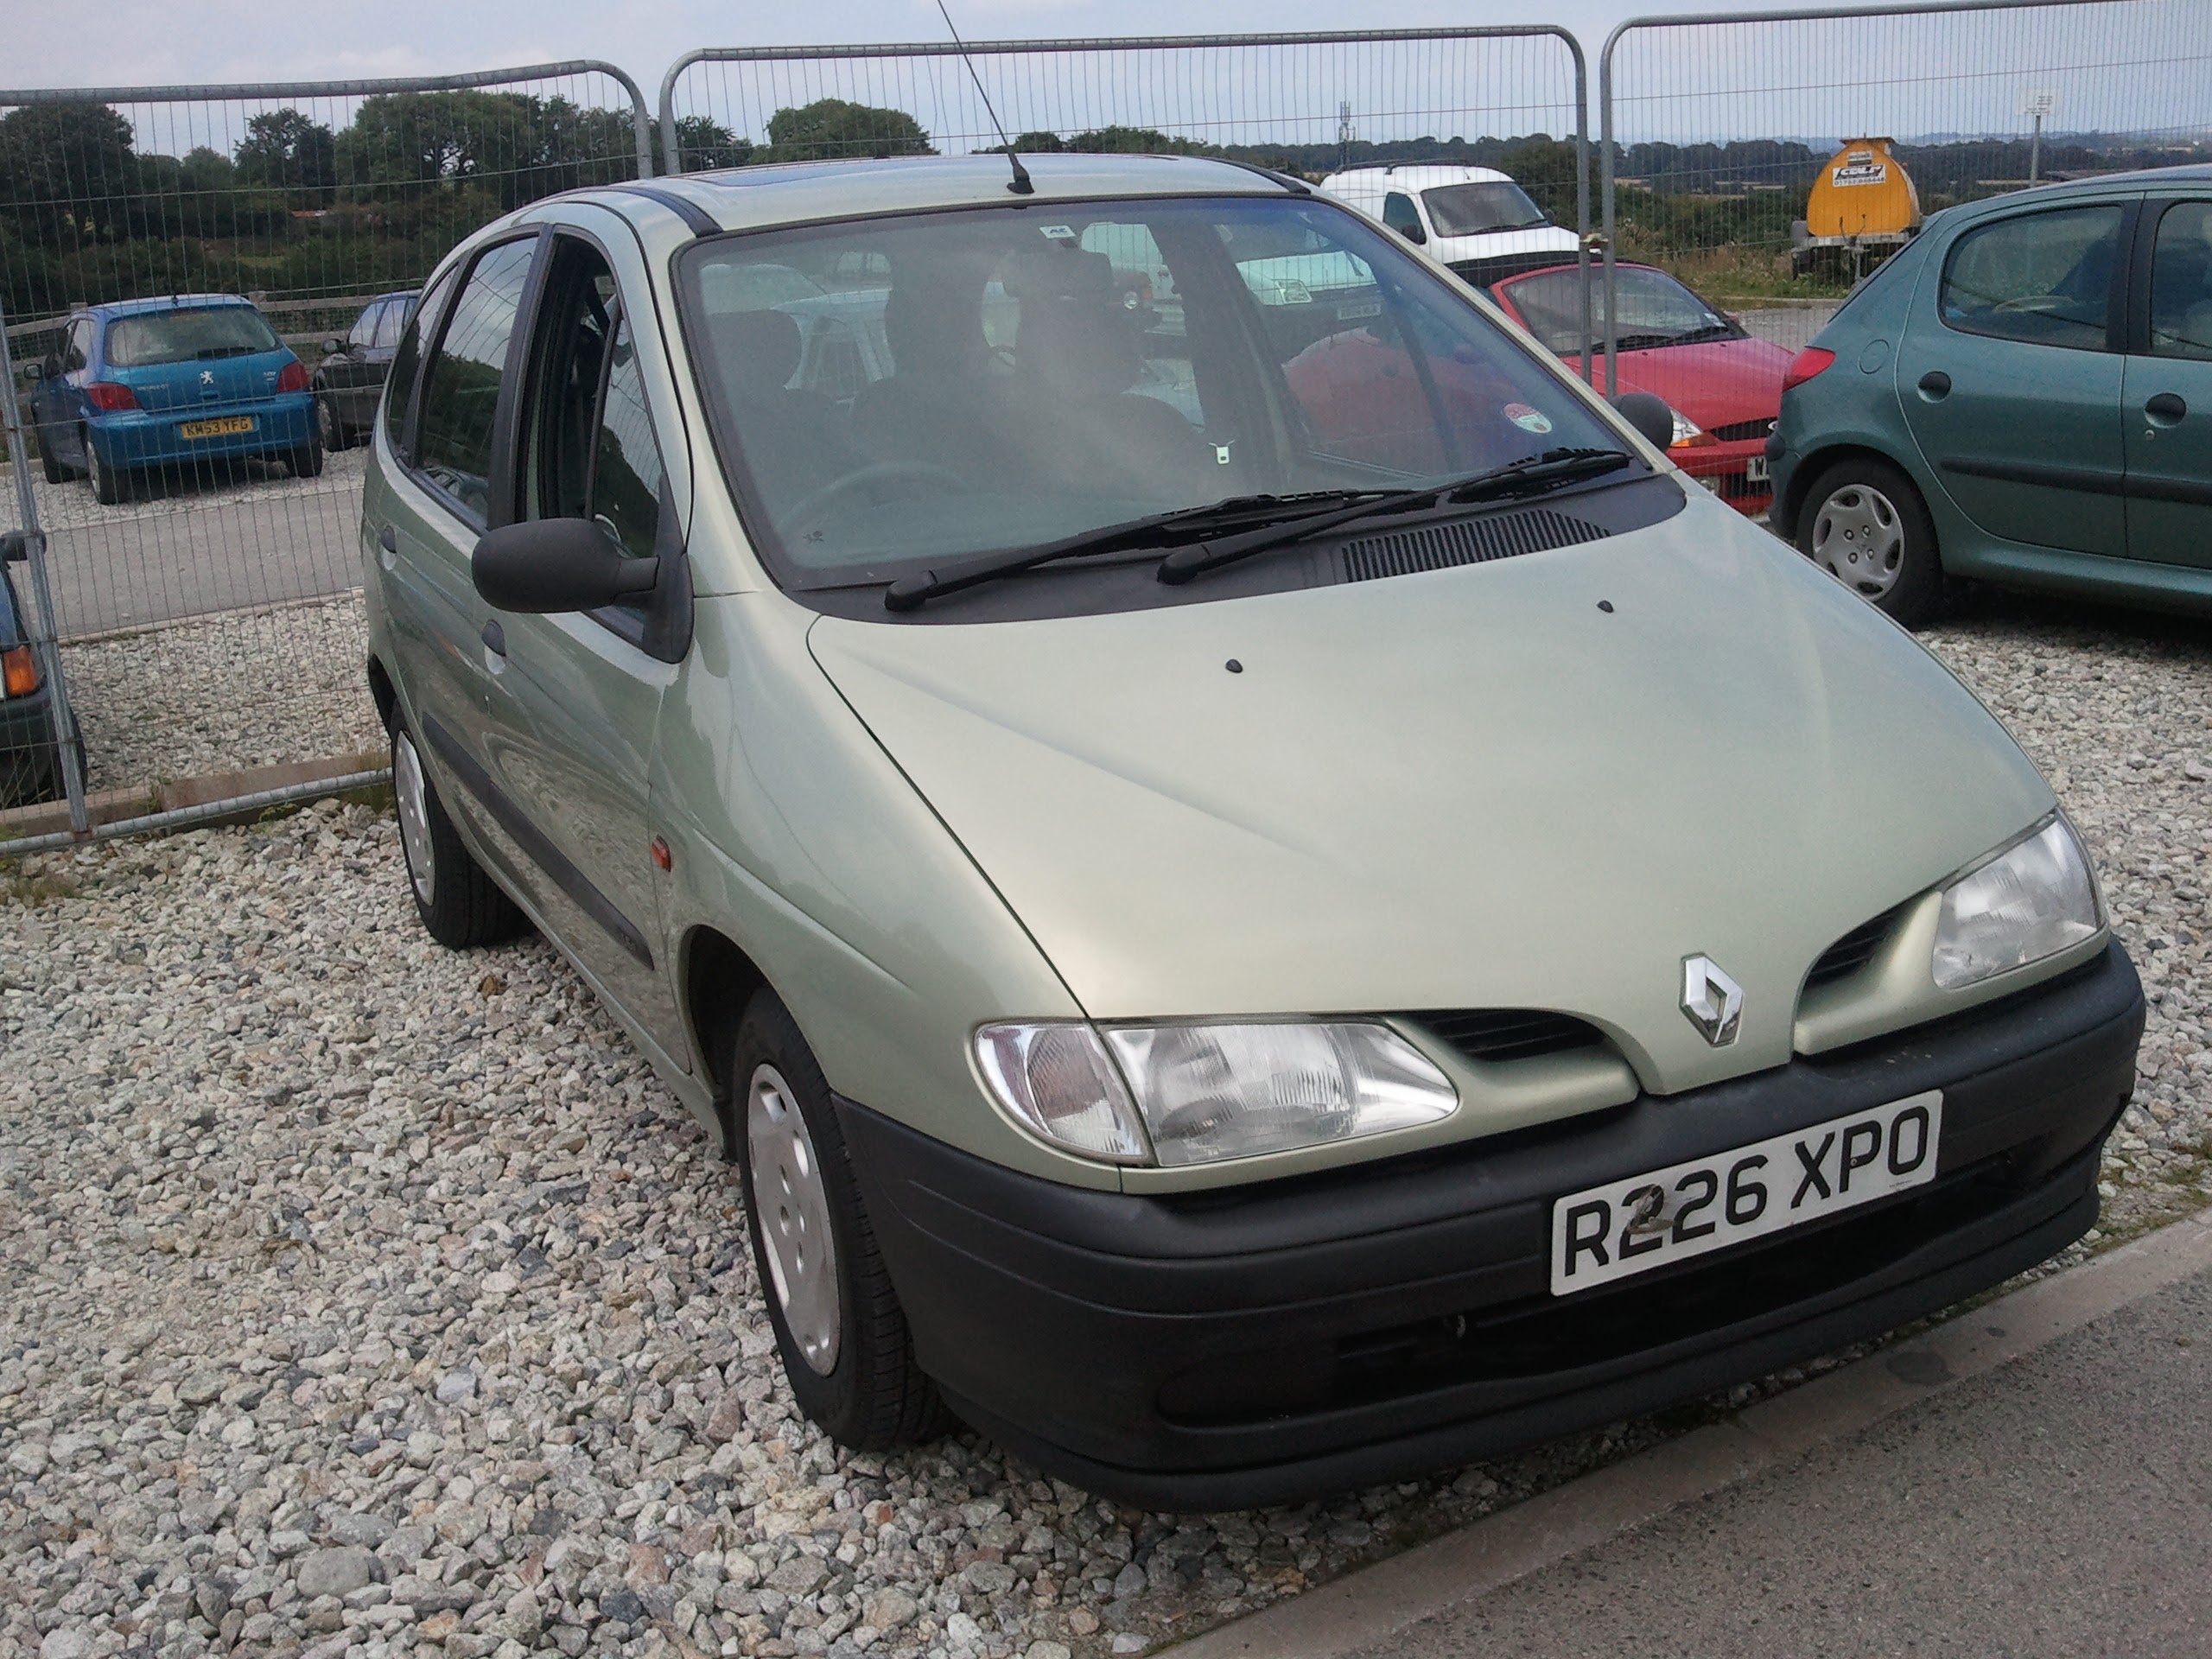
If restrictions allow I would love to do another multi-country trip this year, albeit maybe not in a 1998 Renault Scenic. As for documenting it, whether it’s just a photo album or a full blown site I very much intend to strike why the iron is hot and attempt to beat my previous build record of 10 years.