The eagle-eyed reader of this blog will have noticed that reviews are not typical for falkus.co. When I was considering purchasing the H.View camera I could only find reviews and guides for more popular brands (your Canon/D-Link/FOSCAM etc), but nothing for the cheap-and-hopefully-cheerful H.View. I'm aiming to fill that gap. This post is a brief overview of the power over ethernet IP camera, how I went about setting it up with my NAS and my general impressions of an IP camera that costs less than £40.
Why did I purchase a PoE camera?
I expect for most people the reason is for security, or just to casually check up on their house/office when not physically there. My reason is less conventional - I wanted to put a camera in my loft. It does not contain anything of value or have anything even remotely interesting to look at. However at one point last year I suspected that a mouse or similar was getting in to the loft, which I wasn’t super keen on. I was never able to prove this though. As a developer, the most logical and practical way to get to the bottom of this possible issue seemed to be to purchase a camera which could keep a check on the situation in the loft at all times and alert me if there was any movement detected.
My requirements for a camera were that it had to be cheap, run using only a single ethernet cable via PoE (my loft does not have any power easily accessible), be compatible with the ONVIF standard, plus have built-in infrared LEDs or similar to allow video recording in the dark - understandably I do not want to leave a light on all the time in the loft for this project.
The H.View PoE IP camera met all the above criteria. It also had the bonus of being suitable for external mounting, which is something I thought would make the camera more useful in the future once the loft project was complete. There is a 4 megapixel version, though I opted for the cheaper 2 megapixel camera as that is plenty of pixels for this project.
What comes in the box?
The camera comes packaged with an ethernet cable, ‘warning!’ sticker, user manual, screws, ethernet cable protector and CD. The CD says ‘Driver’ on it, which sounds surprising for an IP camera. From scan reading the user manual it would appear to contain software for recording footage from the camera to your computer. I didn’t investigate further though as I had a specific idea of how I wanted to manage the camera, which is via a Synology NAS.
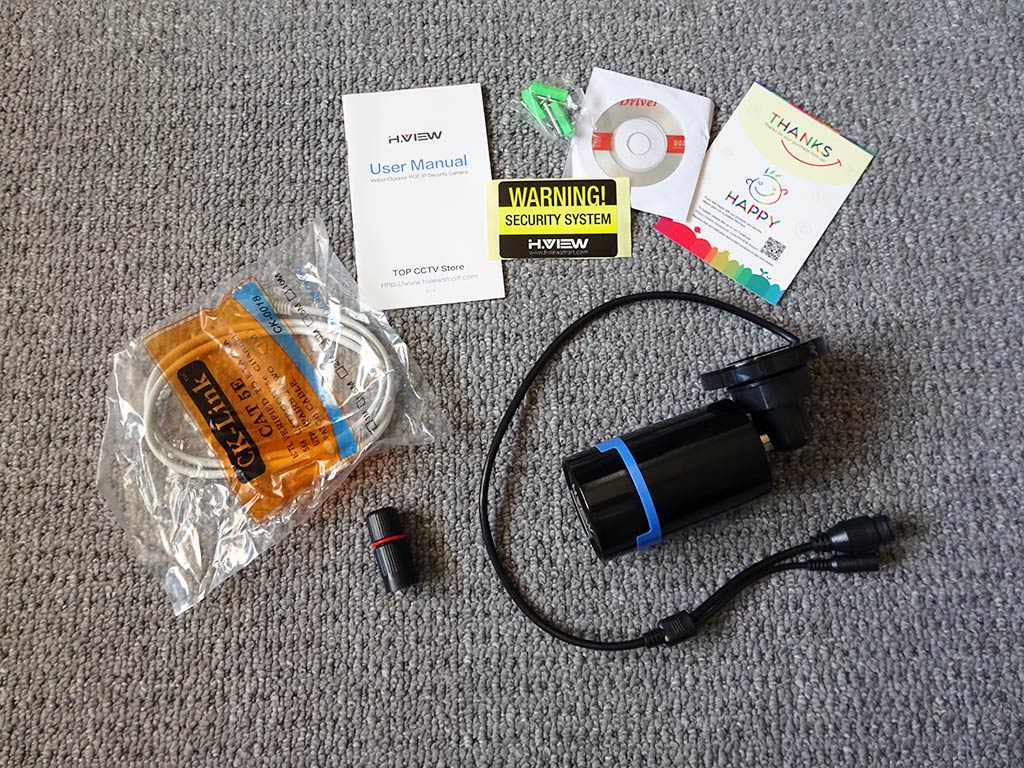
H.View PoE IP Camera - What's in the box?
What about power?
The camera does not come with a power supply. You will need to either provide a 12v supply, or use a power over ethernet injector. I opted for the latter option, purchasing a TP-Link PoE Injector, that has worked flawlessly. If you intend to run more than a single camera then a better option is to purchase a PoE capable switch.
Installation for a Synology NAS
My Synology NAS is used as the house backup server, covering a few laptops and a couple of remote servers. Aside from that crucial task it’s barely utilised. I’d read online that Synology’s Disk Station Manager software includes a package for managing and recording video from IP cameras called Surveillance Station (here is an overview). I figured that if Surveillance Station was anything like the quality of Synology’s other apps it would be a good choice for running the camera. There is a big list of cameras supported by Synology on their website. The H.View camera is not on the list but does claim to be ONVIF compatible, meaning it should still work with the NAS regardless.
Initial Camera Setup
The camera has a default IP address in the 192.168.1.x range, the specific address for camera purchased is printed on the box. Navigating to this address in your browser presents a login screen for the web portal running on the camera itself. The default credentials are username admin with the password field left blank. I’m sure I don’t need to point out that it would be a very good idea to change these (I’ll point you in the right direction: ‘Setup’ tab > ‘Advance setup’ > ‘User Management’).
With the camera accessible on your network and a secure username/password combination set we can now start configuring Surveillance Station. Once you’ve entered the Surveillance Station interface:
- Click IP Camera
- Select ‘Add’ > ‘Add Camera’
- Select ‘Quick Setup’. It is easy to edit and/or remove the camera at anytime, so for the purpose of quickly getting setup to explore the options I’d recommend the ‘Quick Setup’.
- Enter a name for the camera, the IP address plus the username and password (as configured earlier). The brand can be left as
['ONVIF']with the camera model set toGeneric ONVIF. Whilst Synology does provide exact settings for many specific cameras, this H.View camera is not one of them. - Hit ‘Test Connection’ and check you see a green tick. I ran this procedure a couple of times and didn’t always see a test image, so that isn’t necessarily a problem if on test the green OK tick appears but with no initial picture.
After completing those steps the camera should appear in your IP Camera list with a preview following close behind. By default it will be recording all the time. Once you have 10GB worth of footage the NAS will start archiving the oldest video footage. These settings can of course be changed. I’ve configured my loft camera to record only a few seconds before and after any motion is detected, using the highest sensitivity possible (I don’t expect any ‘normal’ movement in the loft) based on the entire camera view. If you would like to set your camera to do the same I’d suggest reading the motion detection section of the Synology NAS help pages (available from within the DSM interface).
How do I change the text that appears over the video?
The text is set directly by the camera. If you log back on to the web portal of the camera (same IP address as before in your web browser, then navigate to Setup > Media > OSD Setup) you can change the channel name which in turn updates the text overlay. The time is also set on the camera itself (Setup > System > Time). The time should be set automatically, though the timezone is not, so unless you want the default GMT+8 it’s probably a good idea to change it.
Is the camera any good?
First of all, the not so good points. The web portal on the camera definitely lacks polish. It appears to be generic IP camera software, as there are several on-screen buttons for features that simply do not exist on this camera (e.g. rotation). The setup pages are very bare bones. These two issues combined give the impression of a camera that is best suited to an intermediate computer user who has at least a basic working knowledge of computer networking. The manual also has a few typos and grammatical errors.
However, I think all this can be forgiven. Paired with a decent NVR (Network Video Recorder), such as Synology’s Surveillance Station, the camera does a good job. I’ve had it running continuously without issue for a couple of months and there’s nothing to suggest it won’t keep working reliably. Using a decent NVR also provides confidence regarding motion detection and general management of the camera.
The camera was very slightly larger than I expected, but on reflection I’m not sure whether I had an unrealistic idea of how small PoE IP cameras can be. The image below shows the camera with a blank CD to give an idea of scale.

The camera is a similar length to a CD.
Image Quality
I think the picture quality is fairly decent for an entry-level camera. I haven’t tried it outside, but below are a couple of frame grabs from camera video footage, one of part of an office and another from the infamous loft.
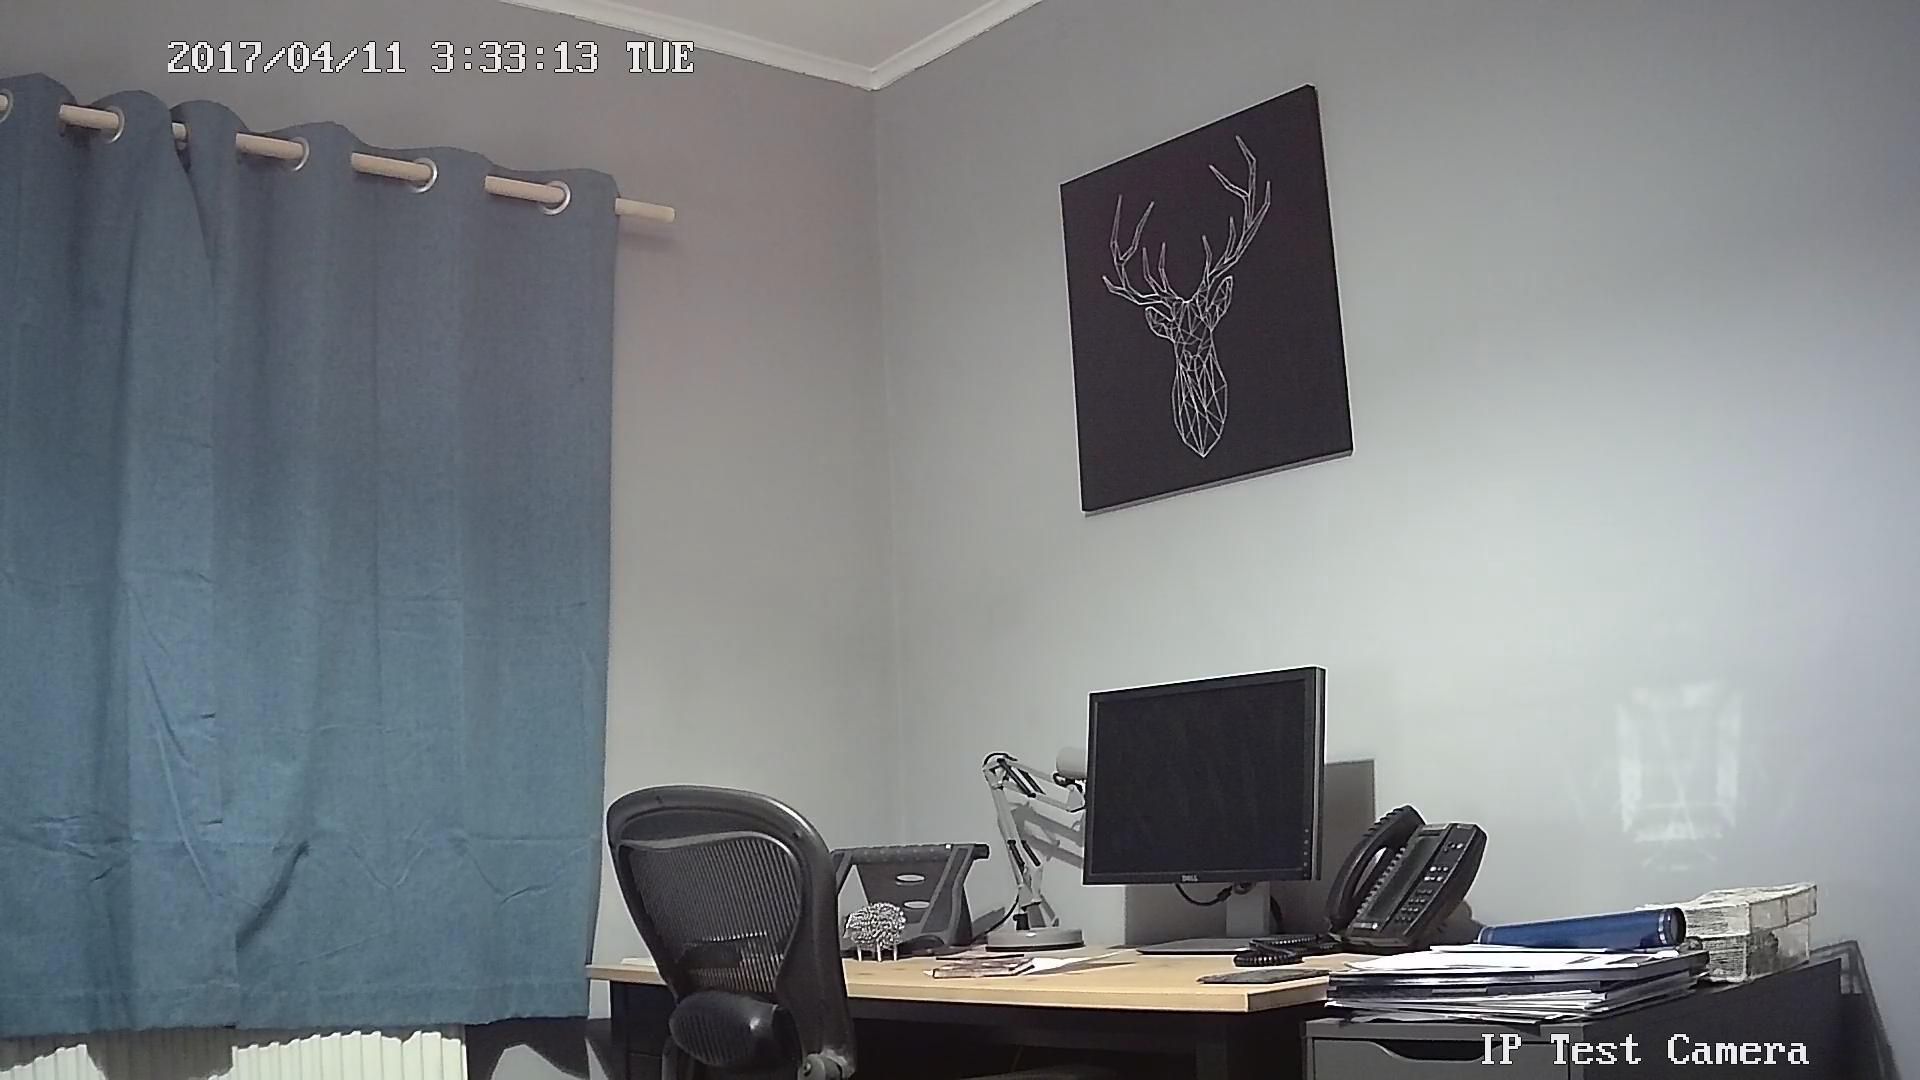
H.View camera - Picture taken as a frame grab from recorded video.
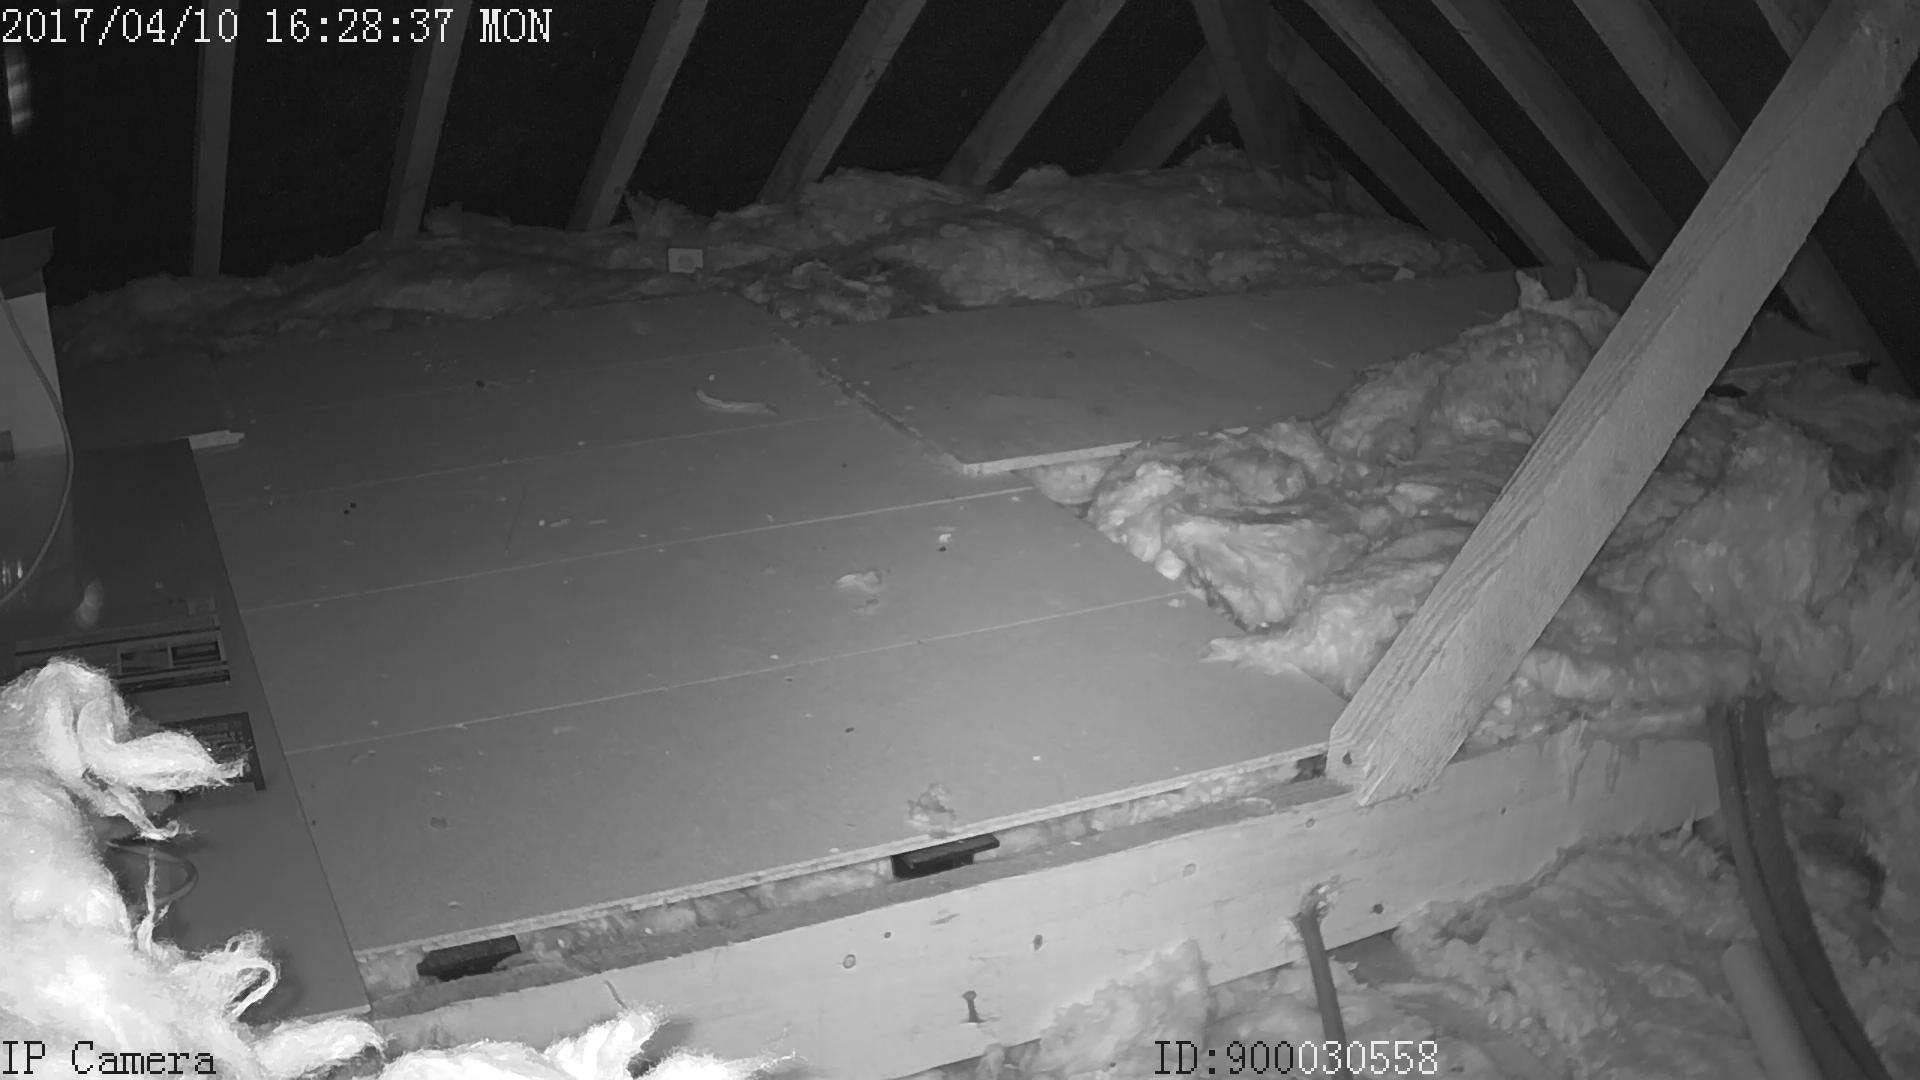
H.View Camera - Ensuring no motion goes undetected in the loft.
There is an initial audible click when the camera switches over to night vision mode, which can be confirmed as the infrared lights have a slight red glow to them when in use. The infrared lights are more obvious than I would have expected them to be when on. A quick google suggests this is common for entry-level night vision cameras, so nothing to worry about.
Summary
The H.View PoE camera is a very interesting camera for the right sort of user. The right user is likely to be someone who has already invested in a NVR or similar and has enough technical knowledge to be comfortable configuring the camera. It’s certainly not complicated, but might prove to be a slow process for those unfamiliar with networking.
The camera image quality seems reasonable, and the device worked flawlessly with my Synology NAS, allowing me to follow through with my initial idea of adding a night vision PoE camera to the loft. The NAS does all the heavy lifting with regards to motion detection, recording the video and sending out alerts. The camera has done a good job of reliably sending video to the NAS, watching over the loft day and night.
Although the web portal on the camera is a little rough around the edges, let’s not forget that this camera cost less than £40! For an internal and external capable IP camera that can work via PoE that is pretty impressive value for money.
I am still interested to try the camera outside but at the time of writing haven’t had a chance yet. Perhaps I’ll do a half-year follow-up to report back on whether the camera is continuing to work well.